 |
| Yamaha RD125A 1974 |
 |
| Yamaha RD125A 1974 |
 |
| 2 stroke Engine Yamaha RD125A 1974 |
 |
| Carburettors Yamaha RD125A 1974 |
 |
| Only 9904 Km - Yamaha RD125A 1974 |
 |
| Fuel tank - Yamaha RD125A 1974 |
 |
| Seat - Yamaha RD125A 1974 |
 |
| Original rims - Yamaha RD125A 1974 |
 |
| Original Reflector - Yamaha RD125A 1974 - love the little details |
When I got home and unloaded the bike form the van I kick started it one more time just to listen...All of a sudden it was running high revs on one cylinder! Oeps... I quickly switched off the engine before it got damaged inside. You never know what's been growing inside the engine during the 16 years of hibernation...
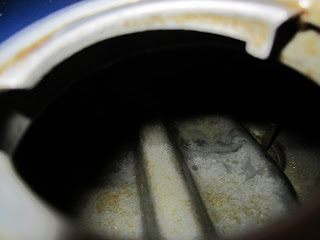
First of all I checked the inside of the fuel tank; pretty rusty, not rusted trough but more then flash rust.
OK, timer for some chemistry. I've already used electrolysis for rust removal on other bike and car parts, so this should be possible with the inside of a fuel tank as well.
 |
| Rusty fuel tank Yamaha RD125 A |
You'll need some washing soda which you can buy at your local supermarket for a couple of dollars, a battery charger, a bucket, ductape and a metal rod.
Empty your tank completely and rinse it with water on the inside.
Fill the bucket with water and add approximately 500 grams of washing soda to 10 litres of water. Mix it till it's all dissolved and pour it in your tank. Don't worry about the paint or other parts, like you fuel tap. The solution won't attack it. If you spill some on your paintwork, just wipe it of and rinse with some water if you want. Make sure the fuel tank is completely filled so the inside top of the tank will also get de-rusted.
 |
| Making washing soda solution for de-rust electrolysis |
Now grab a metal rod, bent it in shape so it will go all the way in the tank and make sure it won't touch the metal parts of the tank. I put some ductape at the end of the rod and around the fuel cap opening.
 |
| Metal rod as anode in fuel tank Yamaha Rd125 - tank is the cathode |
Connect the Neg (-) black lead of your battery charger to the tank (best is a bare metal part) and the red (+) wire to the metal rod and switch on you charger. I've a pretty heavy battery charger so it started the process with 22 Amps. You'll see and hear the solution bubbling and after a while you'll get some foam forming. After an hour or so the Amps had dropped to 2, so I switched the charger off, took the rod out of the tank and cleaned it. It was very rusty. You can sand it, but the best way I found to clean it is dipping it in hydrochloric acid for a couple of minutes and then rinse it with water before you put it back in the fuel tank.
I repeated this every couple of hours to keep the process going.
 |
| Rust removal Fuel tank with electrolysis |
 |
| Ampere reading at the start |
 |
| Ampere reading after an hour or so |
 |
| Cleaning the metal rod / anode with hydrochloric acid |
You'll see that the solution in the tank will get hot after a while.
After 8 hours or so I emptied the tank and rinsed it with water, it was almost rust free but I decided to give it another treatment the next day.
The last minuscule rust parts can easily be removed with some hydrochloric acid (HCL). I used 30% HCL and mixed it with water to get a 15% solution. 1 Litre is enough to clean the tank. Be careful when you pour it in the tank and keep some water nearby to rinse spills on you paintwork. Put the fuel cap on and shake thew tank in all directions for a couple of minutes. Trow out the acid and rinse with lots of water. Try to get all the water out and use a hairdryer to get rid of the last water drops.
You'll see that flash rust will form within 10-15 minutes, so to stop this put some motor oil in the tank and make sure it's covering all the metal parts. I left the oil inside for a day and shook it a couple of times.
 |
| Inside fuel tank after rust removal |
 |
| Inside fuel tank after rust removal with electrolysis |
Next thing is to take of the exhausts and check the inside of the cylinders.
hi!...how are you?...wann to ask you somthinhg about this bike..i have same model....just started working on them....so just wann to know about this bike....if you using Facebook den add me there Vinay B. Kadam
ReplyDeletewhite vinegar and distilled water did way better job on the tank I did... a '77 XS 650 tank that was way worse when started and noticeably better when finished. Way easier and cheaper too....
ReplyDelete